
For smaller amounts of data, you can enter information directly into the import tool without uploading a file.
❔ How do I do it?
Getting started
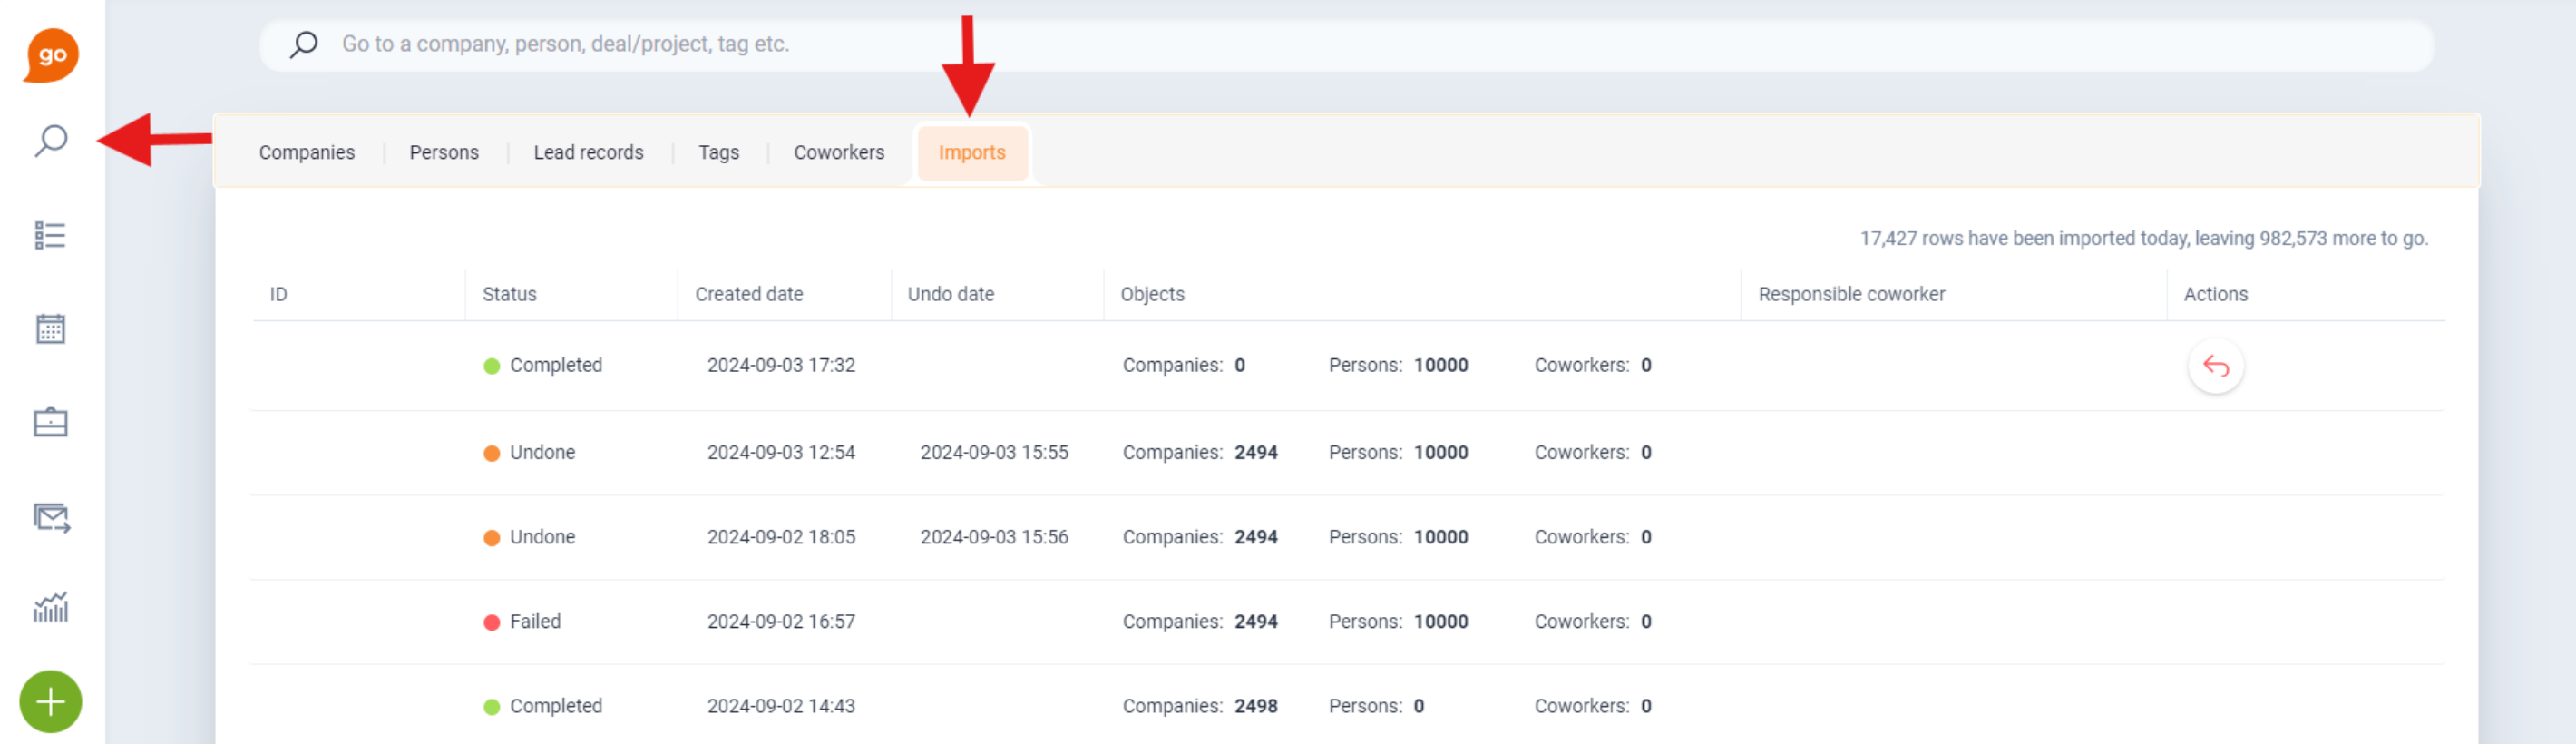
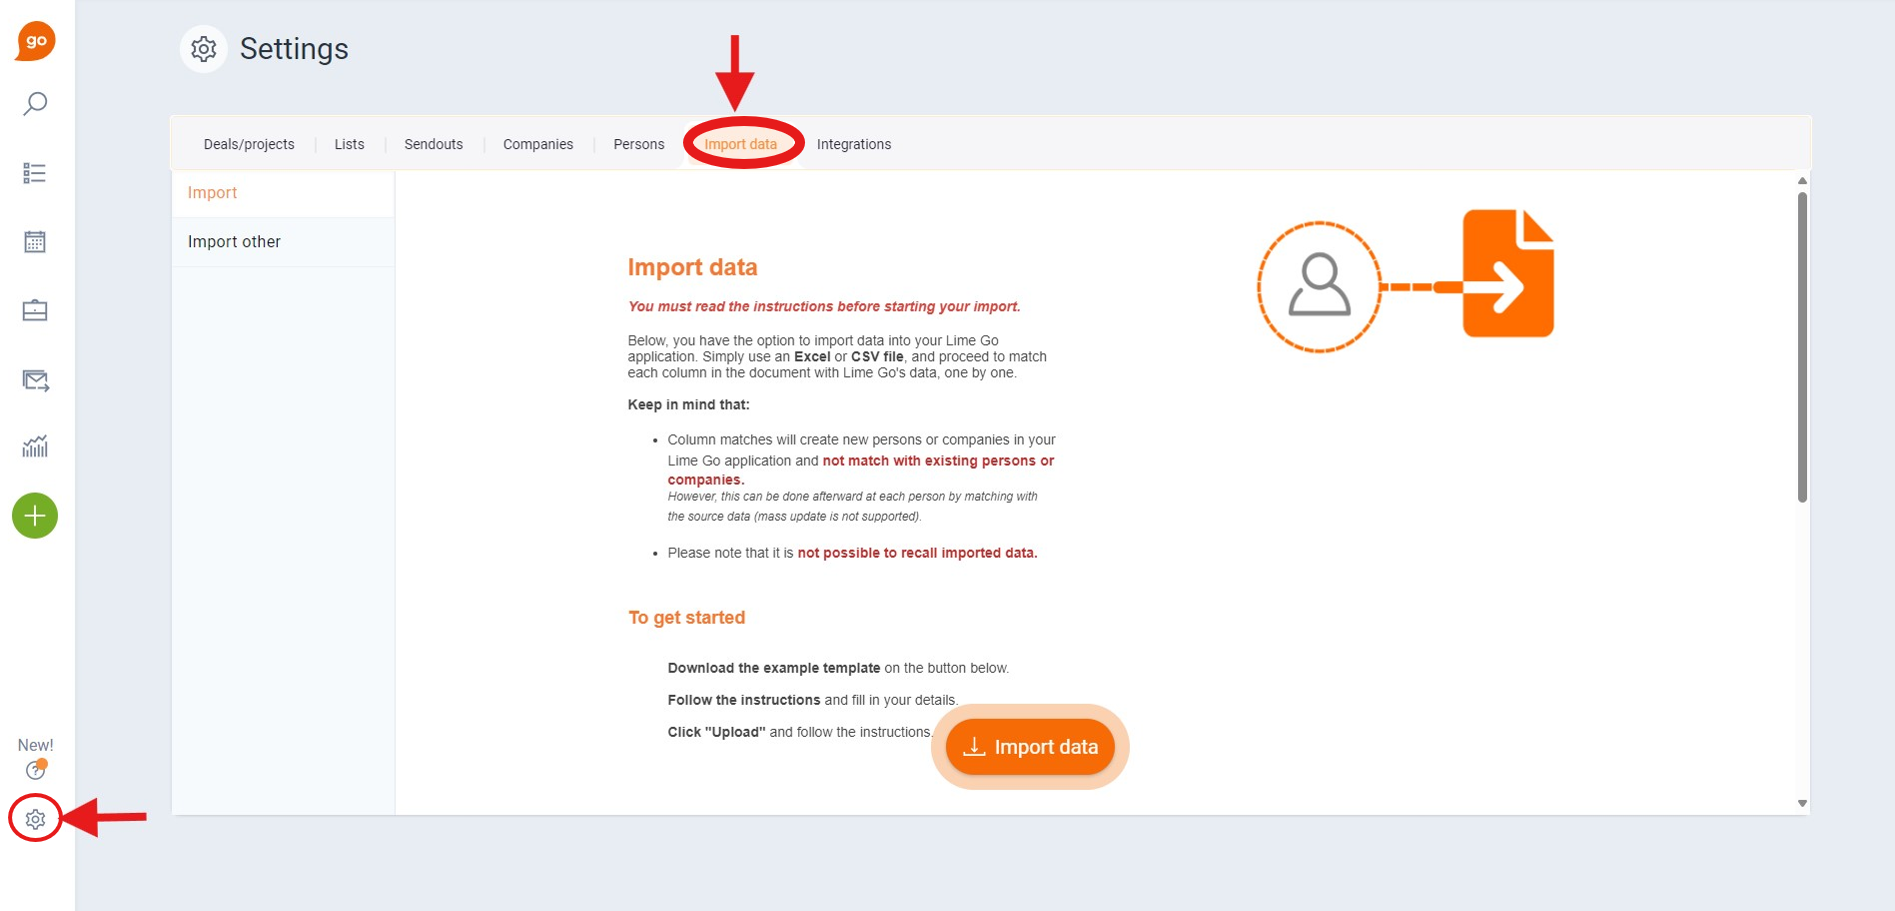
You'll find the import tool in two places:
- Under Find in the menu on the left – click New Import.
- Under Settings and then Import Data.
You need administrator permissions to create new imports or undo existing ones. However, you can view the import history without administrator permissions.
Step 1: Open the import tool
Navigate to Find in the top left corner and click New Import, or go to Settings and select Import Data.
Step 2: Enter data manually
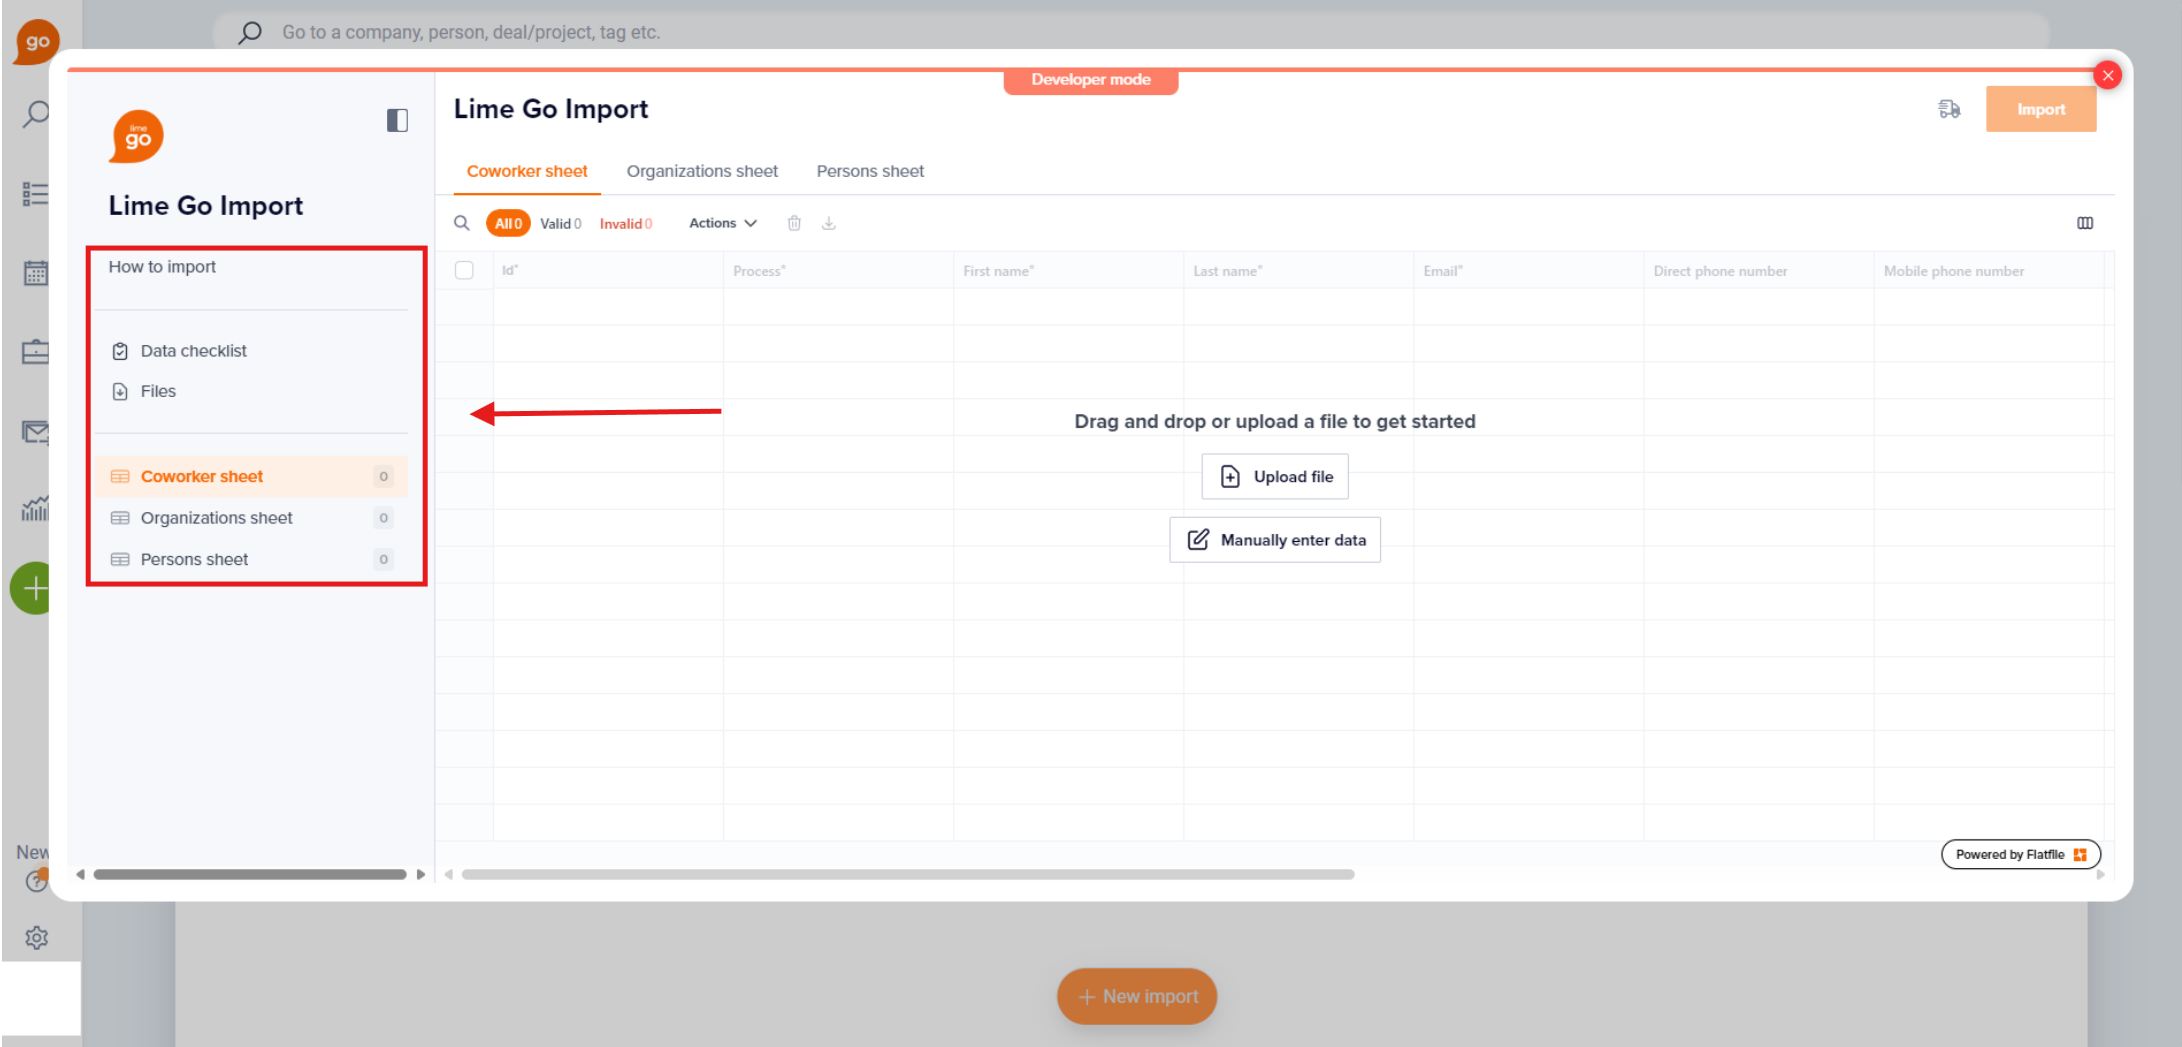
A popup window opens. Type the information directly into the sheets in the window.
Manual entry is suitable for small amounts of data. For larger amounts, we recommend importing via file instead.
Step 3: Import
Click Import. The system now runs a background match against existing data in the database – this can take up to 10 minutes. The Matched column shows Yes or No for each row.
Your import is listed as the first entry in the import table. Follow the status to see when it's completed.
It's not possible to set values for custom fields with manual entry.
For a complete overview of the import tool, click here.